Renovations pump dust, paint fumes, and chemical odors into the air, harming comfort and indoor air quality. Using the right air purifier in the right room reduces airborne particles, VOCs, and lingering smells. Choose a purifier sized for the space with HEPA for particles and activated carbon for gases. Position the unit for strong circulation and run it during and after work for best results. Proper filter maintenance and ventilation speed recovery and keep exposure low.
What Air Purifiers Do in Renovations
Air purifiers help cut through the mess that renovations stir up, especially as dust and fumes start floating from room to room. You can lean on them to pull tiny particles from the air, so your space feels less strained and more livable.
With a true HEPA filter, your purifier traps fine dust that sweeping misses, and carbon layers can help soften sharp odors from paint or glue. Place clean air signage near the work zone so everyone recalls where fresh air matters most.
In case moisture builds up, portable dehumidifiers can support the purifier alongside keeping the room drier and more comfortable. Together, these tools help you protect shared spaces, breathe easier, and keep your home feeling welcoming while the project moves forward.
Why Renovation Dust Hurts Indoor Air
Renovation dust can quickly make your indoor air feel harsh because tiny particles float through rooms and settle on surfaces you touch.
Whenever you sand, cut, or tear out materials, those fine bits can spread into the air you breathe and irritate your lungs, eyes, and throat.
That’s why you might notice more coughing, sneezing, or that gritty, stale feeling in the air during a remodel.
Fine Dust Particles
Dust can look harmless, but during a remodel it turns into a real indoor air problem fast. You’re breathing the respirable fraction that slips past your nose and settles deep in your lungs, and those tiny bits can sting your comfort.
| Particle | Size | Concern |
|---|---|---|
| PM10 | Larger dust | Still swirls and settles |
| PM2.5 | Fine dust | Reaches deeper airways |
| Ultrafine | Tiny specks | Follows ultrafine behavior |
When sanding starts, your space fills with more than visible grit. You and your household feel it in every room, especially should you share the home during the work. That’s why a HEPA air purifier helps your crew via trapping floating particles before they drift around. It supports the calmer, cleaner feeling you want while the project moves ahead.
Irritant Spread Indoors
Once the hammering starts, the mess doesn’t stay put. You might seal one room, yet dust still rides on shoes, clothes, and tools. That’s why odor migration and chemical tracking matter so much.
As paint, glue, and sealant dry, fumes slip through cracks and spread into your hall, bedrooms, and shared spaces. Fine particles can also float through vents and settle on shelves, toys, and bedding.
You don’t need to panic, but you do need a plan. Close off work zones, run a HEPA purifier nearby, and keep airflow moving out, not in. Then wipe hard surfaces and wash fabrics often. These steps help you protect the rooms you live in and keep your home feeling like yours.
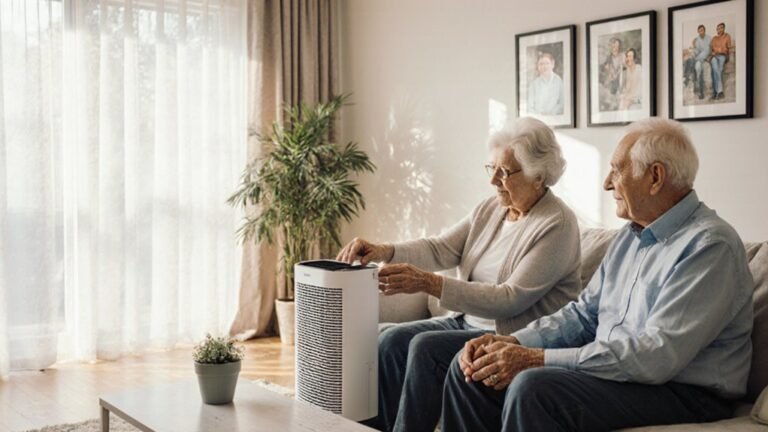
Choose the Right Air Purifier Size
A well-sized air purifier can make a noisy renovation feel a lot less stressful, because the right unit actually keeps up with the mess instead of just humming along helplessly. You belong in a cleaner room, so start with room CADR and match it to your room size. Add occupancy adjustment when family or helpers stay nearby, since more breathing means more demand. | Room size | Choose this |
| — | — |
|---|---|
| Small bedroom | Compact unit |
| Living room | Mid-size unit |
| Open work zone | Large unit |
| Shared space | Multiple units |
If the purifier feels too small, dust can linger and smell heavier. If it’s too big, you might pay more than you need. Aim for steady air turnover, not guesswork. Then place it where you gather most, and let it work with you through the chaos.
Pick HEPA and Carbon Filters
HEPA and carbon filters do different jobs, and during a renovation, that matters a lot. You need both to help your home feel safer and calmer.
- HEPA traps dust, drywall grit, and tiny particles.
- Carbon helps with paint, glue, and odor fumes.
- Check filter compatibility before you buy, so your unit keeps good airflow.
- Watch carbon loading, because a full carbon bed stops helping fast.
When you mix these filters well, you give yourself a stronger defense against the mess. HEPA handles the visible chaos, while carbon handles the sharp smells that can wear you down.
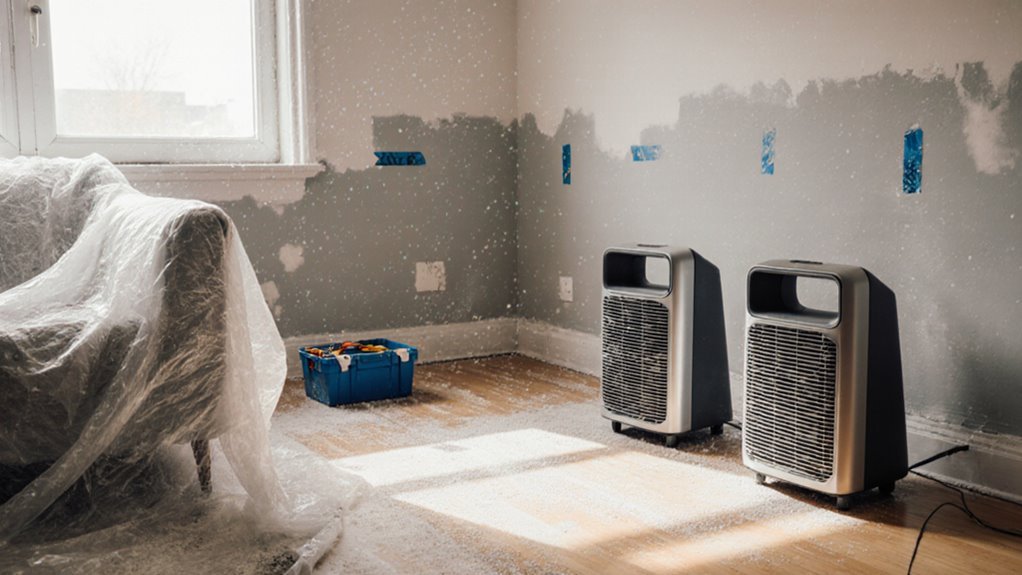
Place Air Purifiers Where Dust Builds Up
Set your air purifier right where the mess starts, because that’s where it can do the most good. Whenever you’re residing through a remodel, you want the unit near sanding, cutting, or tearing areas, not tucked away like it’s shy. A floor intake helps pull heavy dust before it settles, and corner placement can catch drifting particles that gather in quiet spots.
| Spot | Why it helps | Best use |
|---|---|---|
| Near doorway | Stops spread | Shared rooms |
| Near tools | Grabs fresh dust | Active work |
| Low on floor | Catches settling grit | Sawing, sanding |
| Room corner | Reaches stagnant air | Larger spaces |
You’re not trying to chase every speck, just keep the air on your side. Place it where your crew is working, and you’ll feel more at ease.
Run Air Purifiers Before and After Work
Before work starts, run your air purifier to clear out settled dust and give the room a clean head start.
Keep it going during the job and let it run after work, too, so it can catch fresh particles and help flush the air.
That way, you’re not just cleaning the mess you can see, but also the tiny stuff that likes to linger.
Pre-Clean Air Setup
Getting the air clean beforehand can make a renovation feel a lot less chaotic. You’re not just protecting your space; you’re helping your crew breathe easier too.
Start with a containment checklist, then use source sealing on gaps, vents, and door edges so dust stays put. Next, place your HEPA purifier near the work zone before tools start up, and keep it running after hours so the room keeps feeling livable.
- Choose a unit sized for the room.
- Seal the work area tightly.
- Run the purifier before dust flies.
- Keep it on after the day ends.
That simple rhythm helps you feel less alone in the mess. With a little setup, you can make the whole project feel more manageable and more like your home again.
Post-Work Particle Flush
Once the tools quiet down, keep the air moving so the room can clear out fast. You’ll help your space feel safer whenever you run air purifiers before work starts and again after the last sweep.
During the shift, the purifier catches fine dust that hangs in the air, and after cleanup, it helps strip out what got stirred up from floors and trim. This matters for occupant reentry, because a room can look clean while particles still float around.
In case you’ve been using sealed doors and pressure recovery, the purifier supports that setup through pulling stray debris toward the filter instead of letting it drift back. Place it near the work zone, let it run long enough, and give your crew or family a calmer return.
Continuous Dust Control
Running an air purifier before work starts and keeping it on after the tools stop gives you steady dust control all day long. You help your crew breathe easier whenever you build this habit into containment protocols and worker training. It’s a small move, but it feels like you’re looking out for everyone in the room.
- Start it early on so dust gets pulled down before it spreads.
- Keep it running during sanding, cutting, and cleanup.
- Let it stay on after work so leftover particles keep getting trapped.
- Place it near the work zone for stronger pickup.
Once you pair this with sealed doors and HEPA filters, you protect your shared space better. That kind of care makes the whole job feel more welcoming, and nobody likes surprise dust in their lungs.
Control Dust at the Source First
Start with the mess itself, because that’s where the real control begins. You’ll get farther by stopping dust before it floats than by chasing it later.
Use source control with simple habits: cut materials outdoors whenever you can, score instead of smash, and keep debris bagged as soon as it’s made. Wet methods help whenever dusting drywall or concrete, and a tool-mounted vacuum can catch particles right where they escape.
Smart tool selection matters too, so choose sanders, saws, and vacuums that pair well and fit the job. Once you shrink the cloud at the work area, you protect your home, your lungs, and the people you care about. That’s how your space starts feeling like yours again, even mid-renovation.
Use Air Purifiers for Paint Fumes
Paint fumes can linger long after the brush is put away, and that’s where a good air purifier can really help. You’re not alone when the room smells sharp and your head starts to throb. A purifier with activated carbon can pull in VOCs, while HEPA helps catch fine particles.
- Place it near the fresh paint.
- Choose a strong CADR for your space.
- Look for photocatalytic oxidation only provided the unit is evaluated and safe.
- Watch for ozone concerns, since you don’t want one irritant replacing another.
Whenever you keep the purifier running, you make the air feel calmer and more livable for everyone sharing the space. That small step can help your home feel welcoming again, even during the messiest remodels.
Handle Air Quality Room by Room
Now that you’ve got one purifier working on paint fumes, it helps to bear in mind room to room so you can keep the whole house easier to breathe in.
Start with room zoning, and give the messiest space the strongest cleanup. Place a HEPA unit near the work area, then close doors so dust and smells don’t drift into the rooms where your family relaxes.
In shared spaces, use occupant rotation so people spend less time near the active job and more time in the cleaner parts of the house.
Then move the purifier as your project shifts, like a steady helper that follows the mess. You’ll cut exposure, keep calm in the house, and make each room feel a little more like home while the renovation keeps going.
Replace Filters More Often During Projects
During renovations, your air purifier has to work much harder because dust and fine debris fill the air fast. That extra load can clog filters sooner, so you should check them every week instead of waiting for a problem.
Should you replace them more often, you’ll keep the unit moving clean air whenever you need it most.
Increased Dust Load
Renovation dust builds up fast, and your filters can get swamped before you even notice it. Should you want cleaner air, watch renovation timing and plan occupant relocation during the messiest work. You’re part of a crew that keeps the space safer together.
- Check filters daily whenever sanding or demo starts.
- Replace prefilters sooner, so the main unit can keep helping.
- Seal doors and vents, because dust sneaks into shared air fast.
- Vacuum nearby floors and trim, so settled grit doesn’t jump back up.
Whenever you stay ahead of the load, your purifier keeps doing its job and your home feels less like a jobsite and more like your place again.
Shorter Filter Lifespan
Your air purifier works harder than usual as a project kicks off, and that extra load can wear out filters fast. Whenever dust, paint mist, and fumes build up, filter degradation speeds up, so you might need replacements sooner than you expected. That’s normal, and you’re not doing anything wrong.
| Stage | What You See | What It Means |
|---|---|---|
| Demo day | Gray dust | Heavy capture |
| Sanding | Fast clogging | Shorter life |
| Painting | Odor holds | Carbon used up |
| Cleanup | Brown buildup | Filter strain |
| Reuse | Weak airflow | Replace soon |
Keep your room feeling like a shared safe zone by changing filters more often during the project. This protects performance and can avoid warranty impacts from overworked parts. Should the unit sound strained or smells linger, treat that as a sign to refresh the filter now, not later.
Check Filters Weekly
Provided that the filters already look tired, weekly checks can keep you ahead of the mess before the purifier starts to lose its grip.
During renovations, dust and fumes pile up fast, so your filter inspection should become a steady habit, not a guess.
You’re protecting your space, and that means staying close to the unit.
- Pull the filter out and look for gray buildup.
- Hold it to the light and see whether air can pass.
- Check seals, edges, and frames for dust leaks.
- Keep filter logging so you know when to replace sooner.
Whenever sanding or painting runs all week, swap filters more often than usual.
That simple rhythm helps your purifier keep working with you, so your home feels cleaner and more like yours.
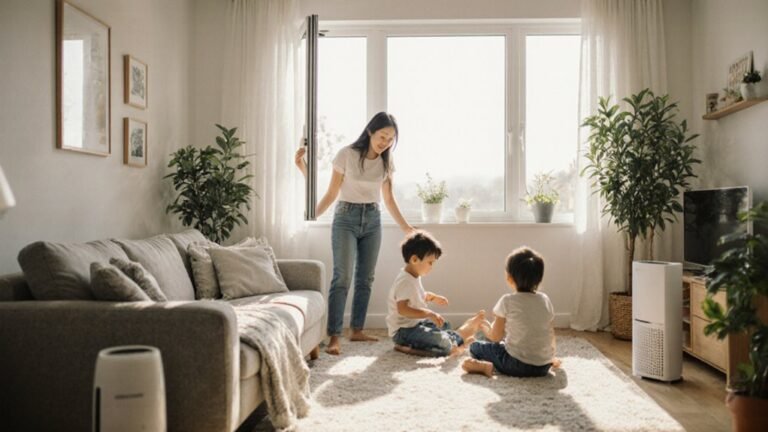
Pair Air Purifiers With Better Ventilation
Along with a good air purifier, better ventilation gives you a much stronger defense during renovation. Open windows whenever weather allows, and pair them with mechanical ventilation so stale air leaves faster. This helps your purifier catch more dust, paint fumes, and tiny particles before they settle.
Should you be able, run fans to move air from the work area toward exits, while keeping doors closed to protect the rest of your home. You’ll also keep thermal comfort steadier, which makes it easier for everyone to stay near the project without feeling boxed in.
Use fresh air breaks during sanding, painting, or glue work, then let the purifier keep cleaning the room. That teamwork makes your space feel safer, calmer, and more like home.
Avoid Common Air Purifier Mistakes
One of the easiest ways to waste an air purifier during a renovation is to use it the wrong way, and that can feel frustrating fast. You’re not alone provided the dust still hangs around, but a few fixes help you breathe easier:
- Place it near the mess, not across the room.
- Match the unit’s size to the space.
- Change filters on schedule, even granted they look fine.
- Ignore false claims about “magic” settings and maintenance myths.
Also, keep doors closed so the cleaner works on one zone at a time. Then pair it with ventilation, because trapped fumes and dust need a path out. Once you set it up this way, you protect your home and help your crew feel like they’re in this together.
Frequently Asked Questions
How Do I Test for Asbestos Before Starting Renovations?
You cannot safely examine asbestos yourself. Hire a licensed inspector who will take bulk samples from suspect materials and send them to a certified laboratory. This protects your household and tells you exactly what is present.
Can Renovation Dust Travel Through HVAC Ducts?
Yes, renovation dust can travel through HVAC ducts, and you can catch it slipping from room to room just as you finish cleaning. HVAC contamination and duct leakage can spread dust, so seal registers and protect your home.
Are Ozone-Generating Air Purifiers Safe During Remodeling?
No, you should not use ozone generating air purifiers during remodeling; they increase ozone levels and can worsen health effects such as irritation and breathing trouble. You will do better with true HEPA and activated carbon units for safer relief.
How Long Should I Ventilate After Using New Paint?
Ventilate for 48 to 72 hours after new paint; you’ll feel like you’ve chased every last fume off the planet. Open windows, run fans, and monitor VOCs until odors fade and levels drop before you settle back in.
When Should I Replace HVAC Filters After Renovation?
Replace your HVAC filters right after renovation, then check them weekly for the initial month. Your replacement timeline depends on dust levels and careful filter handling keeps particles from recirculating through your home.